
On this page
- What Does Furniture Product Photography Cost in 2026?
- What Does 3D Furniture Rendering Cost Instead?
- Why Furniture Sells on Context, Not Catalogue Shots
- How Do You Put a Furniture Photo in a Real Room? The Recorded Workflow
- Styling Scenes That Sell Furniture
- What to Keep Honest
- The Workshop Is for Building
Furniture product photography costs $15-$350 per image at a studio and $500-$4,000 a day for a lifestyle set in 2026, and the piece still has to be freighted to the studio and back. This guide is written by the team behind Visualizee, an AI rendering tool that turns a workshop photo or a CAD export into a studio packshot, a colourway or a styled room shot in about a minute while keeping the piece exactly as it is. Below: what the rate cards publish, why furniture gets returned, and the recorded workflow that produced a packshot, two variants and a lifestyle shot from one grey CAD file.
Quick answer: White-background product photos cost $15-$75 per image at volume studios and $25-$150 from freelancers; lifestyle shots $75-$300 per image or $500-$4,000 a day with a set and stylist. 3D rendering studios charge $80-$800 per packshot and $300-$1,500 per lifestyle render. An AI render costs about $0.27 (one Pro render on Visualizee's $35 Pro plan) and takes about a minute, and the recorded chair walkthrough shows four of them making a catalogue set.
Skip ahead: the furniture-in-room walkthrough is the whole workflow, recorded in the app with the prompts, timings and cost on screen.
What Does Furniture Product Photography Cost in 2026?
A white-background furniture photo costs $15-$75 per image at volume studios and $25-$150 from a freelance product photographer, before the freight bill for getting the piece there. These are advertised rate-card prices, checked in September 2026, not negotiated quotes. For an ecommerce furniture brand shooting at volume, the three studios in the table with per-image pricing and fixed turnaround, ProShot Media, soona and Squareshot, are the services to compare first; the freelancer and Shopify rows show what a bespoke lifestyle shoot costs above that.
| Source | White background | Lifestyle or room set | Notes |
|---|---|---|---|
| ProShot Media | $15 per photo + $100 setup | $19 per photo + $139 scene setup; hero $89 | Market survey on the same page: offshore $3-$12, mid-market $15-$40, freelancers $25-$75 per photo |
| soona | $39 per photo + $149 studio pass | Stylist from $149 per hour | 72-hour edit delivery; pay per shoot |
| Squareshot | from $50 per image | from $95 per image | Oversized products count 1.5x; recolouring $20 per image; 8 days to final shots |
Freelance product photographer | $25-$75 simple, $75-$150 complex | $75-$300 per image; half day $800-$2,000, full day $1,500-$4,000 | Styling $500-$1,500 a day; studio rental $50-$200 an hour (2026 rate card) |
| Shopify pricing guide | $50-$350 per image | $500-$3,000 per day | Rush fees 25-200% of the job; stylists up to $2,000 a day (January 2026) |
Two furniture-specific costs sit outside every rate card. Freight: a single large item ships LTL for roughly $200-$800 and a palletised sofa $280-$480 over 500-1,000 miles, with liftgate and residential surcharges of $265-$410 on top (2026 carrier estimates from FreightCenter), and it goes both ways. Quote-only pricing: the UK furniture specialists we checked (Prodoto, ProductPhotography.co.uk, UniQ Studios) publish no prices at all, so budget for a per-project quote rather than a per-image rate. For the wider product-photo market by category, see the product photography pricing guide.

What Does 3D Furniture Rendering Cost Instead?
A rendered packshot costs $80-$800 at 3D studios ($80-$150 at Maverick Frame, $200-$800 at Freedes) and a lifestyle render $300-$1,500, with a fixed volume deal at $198 per model for up to 100 images, so rendering already beats photography on price for anything with variants. The catch is that a rendering studio needs a 3D model first, at $25-$150 per custom item or €29 an hour to build one.
- Maverick Frame (2026): packshot $80-$150, styled lifestyle $300-$500, hero $500-$800, each extra colourway 20-40% of the first image.
- Freedes Studio (April 2026): furniture single product $200-$800, lifestyle $500-$1,500, 5-10 business days, rush 25-50%.
- CGIFurniture (July 2026): $198 per 3D model for up to 100 consistent images including hero, lifestyle, white-background and 360 views, one revision round, 2-3 business days, minimum 30 models a month.
- Welpix (August 2026): white background €49, minimal scene €99, custom scene €299 per image, modelling €29 an hour, €999 minimum project.
- NoTriangle Studio (November 2025): product rendering $100-$800, custom modelling $25-$150 per item, 1-3 weeks.
The industry made this switch a decade ago. About 75% of IKEA's white-background product images were CGI as of 2014, a figure Martin Enthed, then head of IKEA's 3D work, reconfirmed in 2016 (PetaPixel on the CGSociety interview; DEVELOP3D Live 2016). In July 2026 La-Z-Boy said its 3D system "will deliver 16 million individual renders on demand", replacing manual rendering production. Rendered furniture imagery is the norm at the top of the market; the question for a maker is only whether it needs a 3D pipeline to get there.
Why Furniture Sells on Context, Not Catalogue Shots
23% of UK furniture buyers returned a large item in two years, and 55% of them said the colour or finish did not match the online images, so the lifestyle shot is where the purchase and the return are both decided. Those figures come from a 2025 survey of 1,500 UK consumers by Fixtuur. In the same survey 60% of returners said the size was wrong, and 47% said 360 or 3D views would make them confident to buy. Salsify's 2025 research (1,910 US and UK shoppers) found 71% had returned an item over an inaccurate description. Across all of online retail, the NRF and Happy Returns estimated that 19.3% of 2025 online sales would be returned.
The white-background shot answers "what is it"; the lifestyle shot answers "will it look right in my space", which is the question that decides the purchase and the return. Baymard's 2026 product page benchmark found 42% of users try to gauge a product's size from its images, while 37% of sites give them no in-scale image to do it with. A dresser on white could be doll-sized; a dresser next to a sofa reads instantly.
How Do You Put a Furniture Photo in a Real Room? The Recorded Workflow
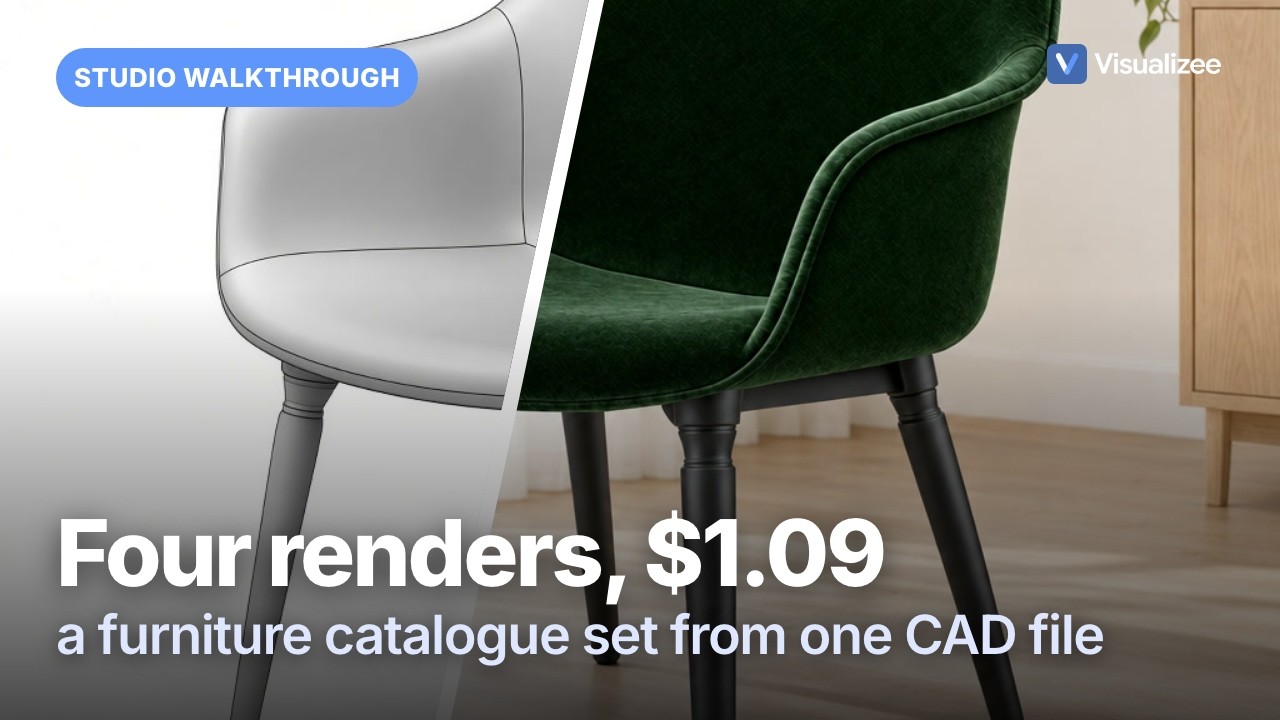
One untextured CAD export became a packshot, a colourway, a hardware variant and a living-room shot in four Pro renders, recorded in the app on 15 September 2026 with the cost and the clock on screen. The furniture-in-room walkthrough has every prompt and every frame; here is the shape of it.
Four more furniture jobs were recorded the same day, all in chat with several references at once, each on its own page with the prompts and the costs: three packshots into one living-room scene, a table and a chair into the six-seat dining set, the next sofa swapped into an existing lifestyle shot, and a colourway from a fabric swatch photo. Each pair of images took two Pro renders, about $0.55.
Step 1: One Clean Input
A phone photo of the piece where it stands, or a viewport export from the CAD model with no materials assigned (any of the tools in the furniture design software guide can export one). What matters: the whole piece in frame, a straight-on or slight three-quarter angle, even light, nothing leaning on it. The recording used a grey clay export of a lounge chair.
Step 2: The Packshot
Render this chair as a photorealistic studio product shot. Light oak legs, warm grey wool upholstery, seamless white background, soft studio light from the left, a subtle floor shadow. Keep the shape, the proportions and the camera angle exactly as in the model.
Copy it, sign in free, paste it to Vizzy. No credit card.
Materials and light go in the prompt; the last sentence keeps the shape and camera as modelled. That is the ecommerce listing solved.
Step 3: The Colourway
Same chair, same angle, same white background. Change the upholstery to deep forest green velvet and the legs to walnut. Keep everything else exactly as it is.
A whole-piece change goes in the main prompt. At a rendering studio this is the "extra colourway at 20-40% of the first image"; here it is one more render, and the furniture material visualizer guide covers running a whole finish range the same way.
Step 4: The Hardware Variant, Marked
Select only the legs with the rectangle tool, write the change in the note, render:
Change only the legs to matte black steel with the same profile. Change nothing else.
A marked region keeps the shell untouched, which is how a maker shows a client the same chair with two leg options without re-rendering the fabric.
Step 5: The Lifestyle Shot
Place this exact chair in a bright Scandinavian living room, beside a large window with sheer curtains, pale oak floor, a small side table with a book, soft morning light. Keep the chair, its colours, its proportions and the camera angle exactly as they are.
Same chair, same colours, same angle, now in the room the buyer is imagining. Change "Scandinavian living room" to "industrial loft" or "warm evening scene" and the piece matches three customer aesthetics before lunch.

Styling Scenes That Sell Furniture
Five room contexts cover most furniture catalogues; match the scene to the piece:
- Scandinavian daylight room: the universal default; flatters wood tones and clean lines.
- Warm evening scene: lamps on, dusk outside; sells comfort pieces such as armchairs, beds and media units.
- Industrial loft: concrete and steel context makes solid-wood pieces read as the warm hero.
- Styled vignette close-up: the piece with two or three props, shallow depth; the social crop.
- Bright airy bedroom: dressers, wardrobes and anything painted.
One discipline from brands that do this well: pick two scene styles and stay consistent across the catalogue. The grid should look like one brand's world, not a furniture fair.
What to Keep Honest
Change the context, never the product. The render must preserve the piece's real proportions, grain, colour and hardware; prompt that preservation explicitly, and check each render against the piece before publishing. The ecommerce image editing guide turns that check into four written rejection criteria (label, construction, finish, proportion) and shows a run where half the attempts failed them. A buyer who fell for a bookmatch pattern that does not exist returns the piece and the trust, and the Fixtuur numbers above are what that costs at scale.
Two furniture-specific checks worth building into the habit:
- Verify scale in lifestyle shots. AI can nudge proportions when placing a piece in a room; compare against the source's dimensions before the render ships, and give buyers one in-scale image, the thing 37% of sites forget.
- Keep wood and fabric colour faithful. Room lighting changes how a finish reads; render at least one shot in neutral daylight so the listing shows the true tone alongside the mood shots.

The Workshop Is for Building
Your piece deserves photography that matches the making, and for the first time that is not a budget line but a prompt: the packshot for the listing, the colourways for the catalogue, the lifestyle set for the feed, all from one photo or one CAD export. Photograph the next finished piece before it ships, run the four prompts, and post the workshop snapshot next to the lifestyle render.
Give every piece the photography it earned. Try Visualizee free with a photo of your latest build, or start with the recorded chair walkthrough. More furniture workflows, including the catalogue math, live on the furniture designers page.
Furniture in a Room. On your own picture.
Upload a CAD export or a workshop photo of your piece. You get the packshot, the colourways, a hardware option and the lifestyle shot, all of the same piece.


Sign in with Google, Apple or email. No credit card.


